Building the Chicken Coop - How we did it - Part 3

After installing almost all of the OSB and the main double doors I made the large nesting box door/lid. I started with only two hinges but ended up installing a third in the center after we finished painting.

The inside after the walls and door were finished.

I left a section open in the front of the coop for the summer time heat, and also cut a piece of OSB to cover it during the cold season.   I stapled some heavy gauge wire in the window opening and in the ventilation gaps near the roof. Next I installed the window with a couple small hinges, and put silicon around the glass on the inside of the frame.


Next step was to raise the chicken run.  For this I decided to lag some 2X4s into the existing 4X4 posts and wrapping it with heave gauge lathing wire (since "chicken wire" is way too thin).
 I also raised the gate and added a second 'dutch' type gate above the existing one.  This way we can just open the top gate to throw some scratch and treats without the hens running out.  I reinforced the top frame and ended up replacing the 2X4 header that is in this picture with a 2X6.
The kids couldn't wait to get their hands on that red paint!  But first we painted a couple coats of white primer to help protect the wood and make the red more... red.

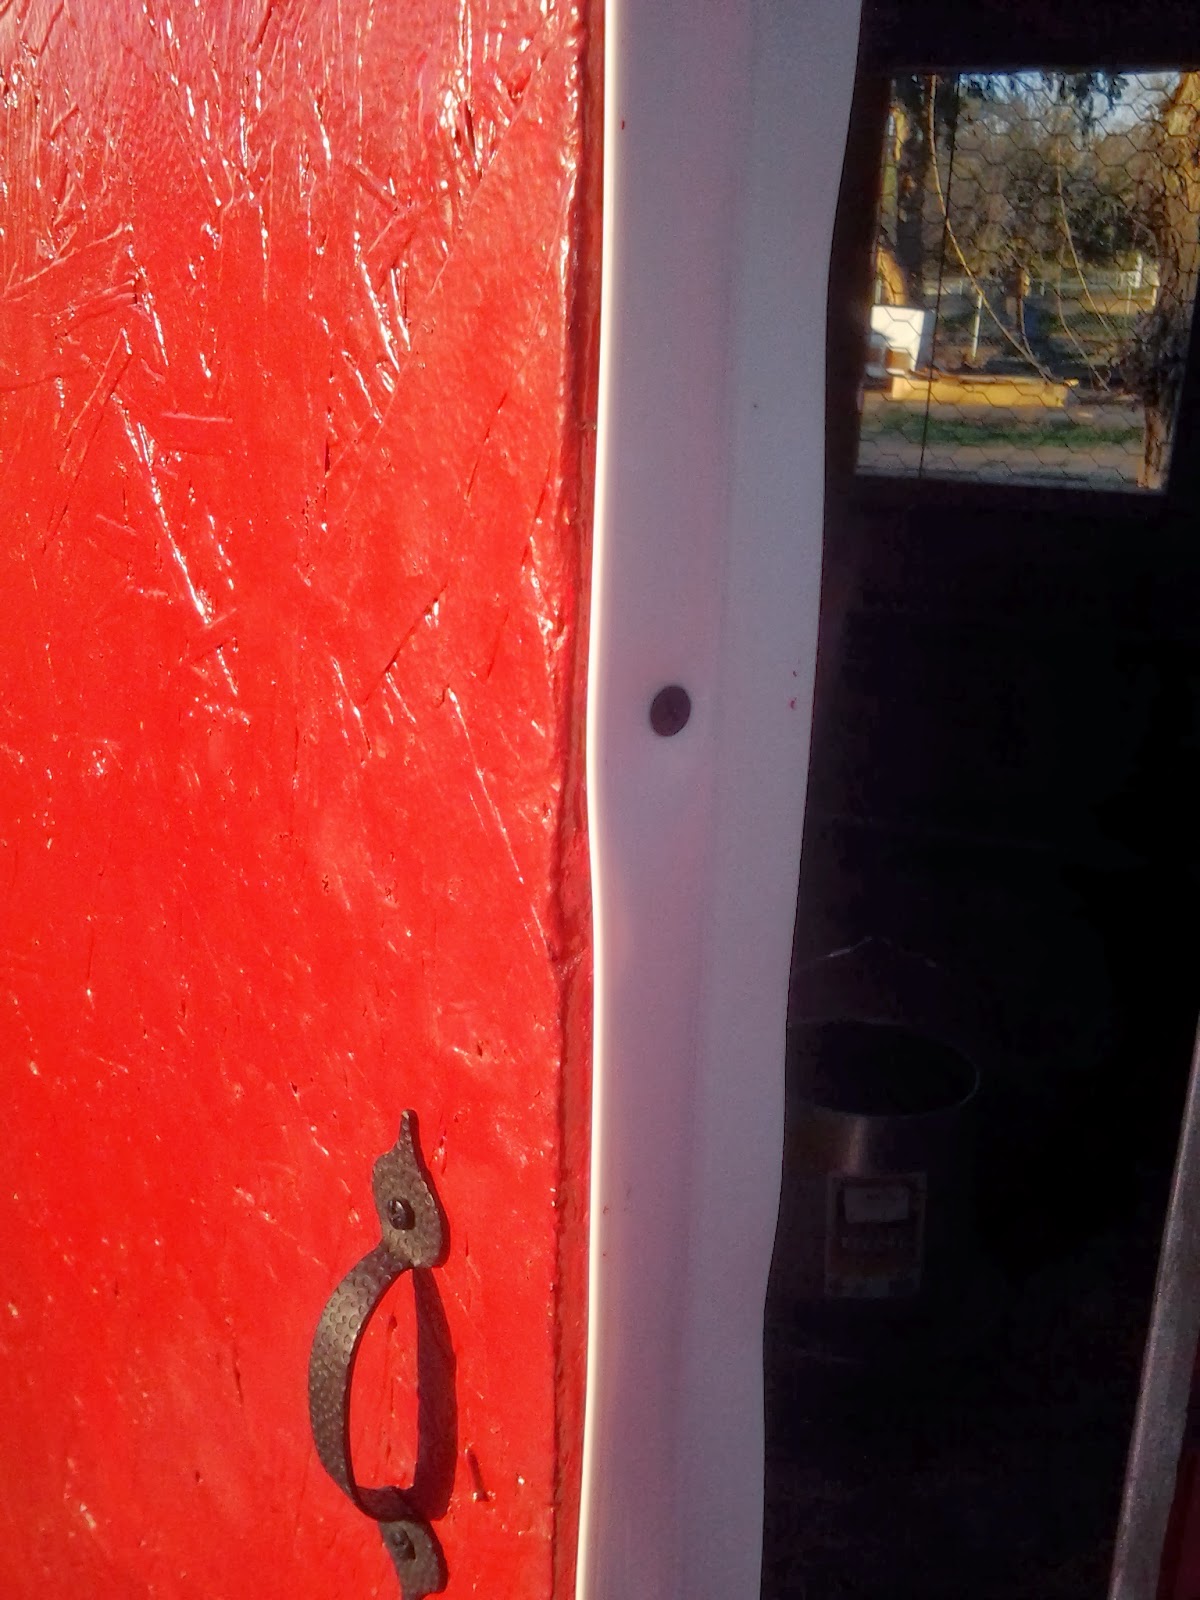
You can see in this picture - I added a small vertical-sliding door with a pulley system so we can open/close the door without having to go into the chicken run. Overkill? yea.
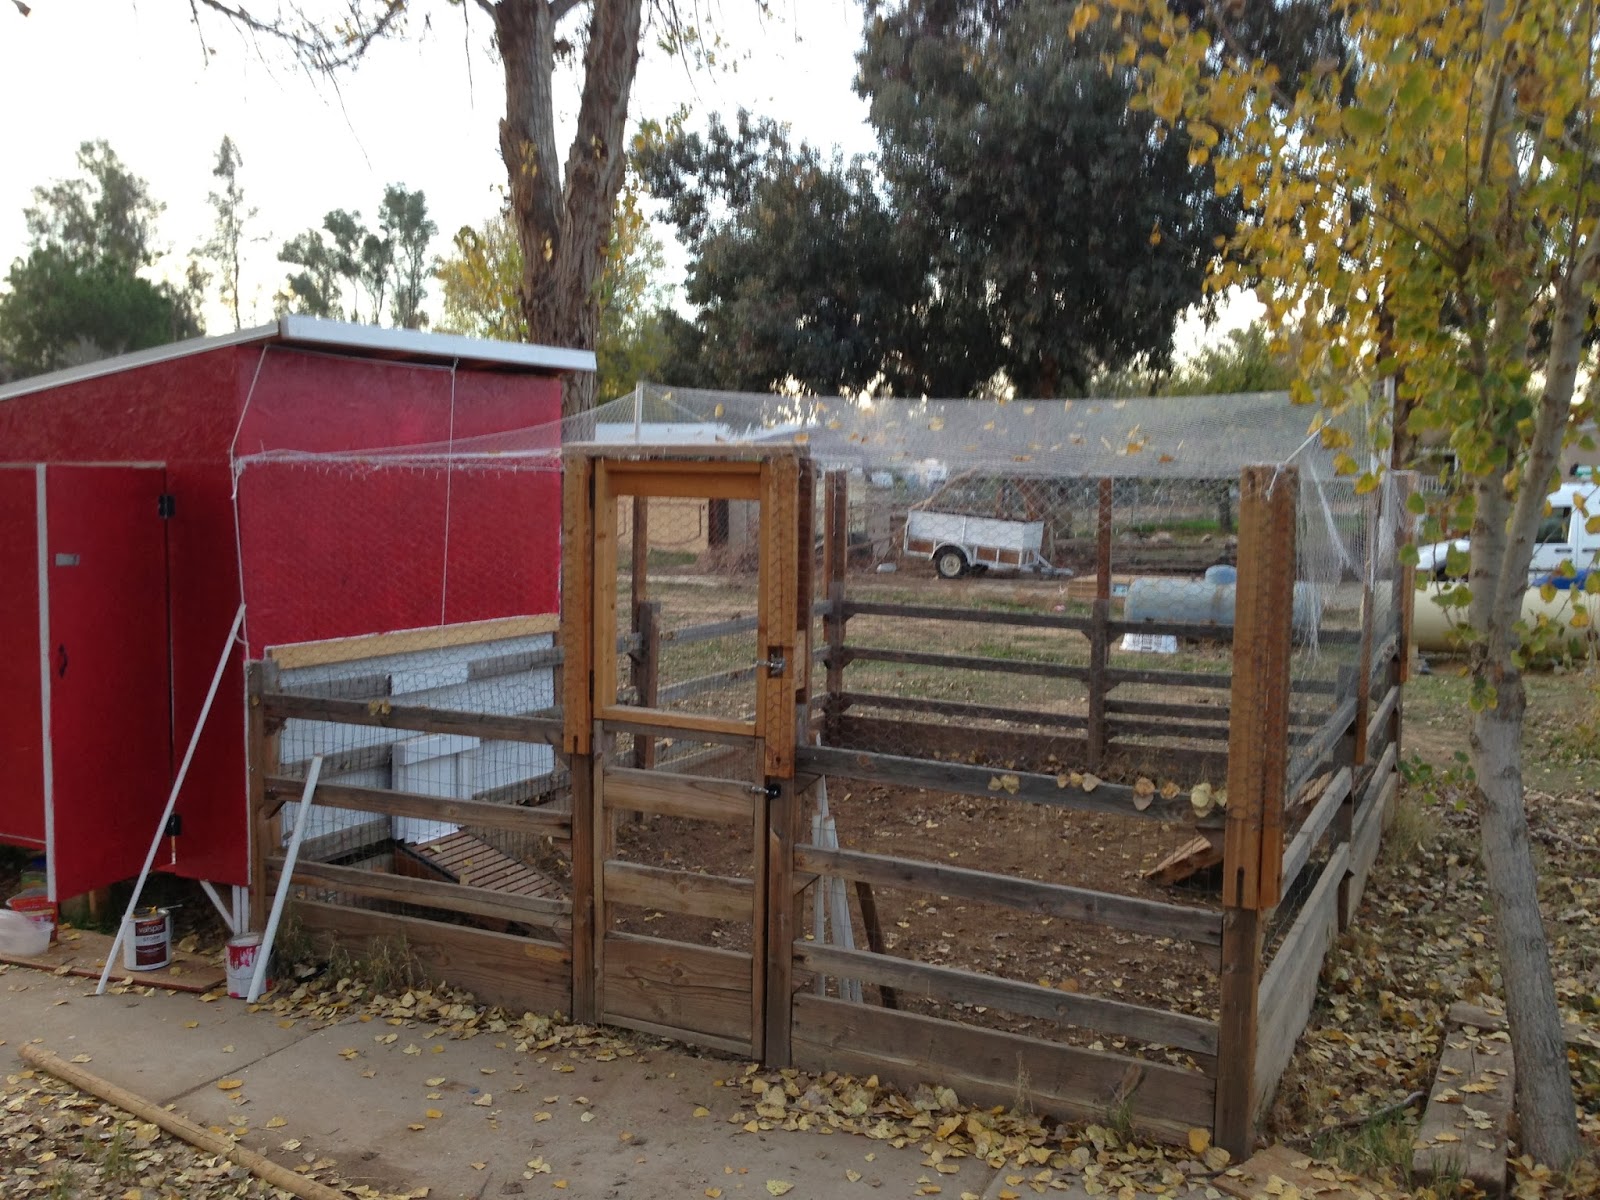


I built a small two-pole roost in the coop, you can also see in this photo, I installed the winter board to close up the front (sorry, it's a bit blurry).

I used silicon and expanding foam on the large cracks inside and then we all took turns painting 2 coats of primer and 2 coats of thick semi-gloss exterior paint on the floor to keep the moisture from absorbing into the wood. 
A view into the nesting boxes... Those are going to be some happy hens!


There are a lot of big hawks that like to hang out in our eucalyptus trees so we decided to install some UV resistant, marine-grade aviary netting over the run, in this photo you can also see the finished run gate.

This is by far one of the most enjoyable projects I have done and is one of many we have planned.  There were a lot of little things I still wanted to do like add white trim boards along the edges of the exterior and around the door to give it that barn look, but it really isn't worth the extra money.  Functionality is key... Instead I focused my attention on self watering cups fed by a 5 gallon bucket and a solar panel/battery/light system - I will write separate posts about how I installed both of those things.

At the time of writing this we have already had our chickens for a month and so far the coop has worked out perfect.
Feel free to ask me any questions about this project!

Building the Chicken Coop - How we did it - Part 2

After building the basic structure of our coop (see part 1) it was time to start building the smaller details like floor boards, double-doors, chicken door, roof and nesting boxes.   Still a lot of work to do and having a day job made the process that much more drawn out.
Some digging around in a pile of junk left by the previous owners, I found wood slats held together by black metal brackets, I'm thinking they were part of a hot tub..?  No matter what they were made for originally, they were Perfect for my chicken ramp - I screwed them to a couple 2X4s and it was ready to go!
Next, the nesting boxes!
I started by attaching some 2X4s for the base of the nesting box.  I ran the two outer boards about 12" under the coop and attached them to the two floor boards I previously installed.  This gave it some extra support since the box is going to be big and heavy!

I jumped off the nesting boxes and threw in the other two floor boards, then I continued framing out the rest of the nesting box with as many scrap pieces of 2X4 I could find.

As you can see in the photos above, we made 4 nesting boxes and cut some 2X4s at an angle for the lid to rest on.  By the time we reached this stage we were out of our $1 2X4s and on a budget so I began cutting a few corners.  Instead of using plywood as originally planned, I purchased OSB board which was much cheaper, it just meant we needed lots of paint!
One thing I should have done is turned the roof boards on end so they wont bow as much over time, but oh well... The chickens won't notice.
On with the OSB board!


At this point of construction, the kids were really excited and running around, making fort plans!
Before I ran out of OSB I decided to build the double doors.  When I framed the double doors into the wall, I just picked a width and figured I would build the doors based on my jam dimensions.
I built a basic frame for the doors out of 2X4s and cut some OSB to fit.  I made the doors about 1" shorter than the opening, I probably should have done 1/2"  to 3/4" because later I had to add thick weather stripping to close the gap.

Now it's getting there!!
Check out Part Three to see how it all turns out!

Building the Chicken Coop - How we did it - Part 1

Here is a quick rundown on how we built the chicken coop - from the ground up.  We took several pictures during construction, I will attempt to add as many of those in as possible.

When we first moved in, there was already an enclosure that we were told was used to keep a potbelly pig. Later we were told by a neighbor that it was used to hold puppies and dogs (yikes!).  I knew right away we would use it as part of the chicken run, it would just need to be raised up.


Next we planned out where we were going to build the coop and about how many square feet we would want for 6-12 hens.  Trying to plan for as little cutting of lumber as possible, I figured an 8' X 8' coop or about 64sq. ft. (not counting nesting boxes) would be perfect.  We decided to build it at the end of the sidewalk, next to a trees and incorporate the existing enclosure as part of the enclosed run.


I made a quick concept sketch and incorporated some of our favorite ideas from the many different coop designs we looked at on the internet. I also added two other things, a solar panel and battery for the light, and a watering system using a 5 gallon bucket (so we wouldn't need to worry about water every day) and automatic watering cups. 

But first, the lumber...

Doing some math we quickly discovered the lumber alone was going to cost a small fortune.  I scoured Craigslist for about a week but was not able to find the right amount of 2x4s we would need, most of what I saw was pallets of lumber for hundreds of dollars.  This may be because of where we live.  If you are planning on building your own coop, I would definitely recommend looking on Craigslist first to try and find some used lumber for a descent price.  It didn't work out for us this time, but I have heard of people making some great scores on Craigslist.

Luckily I was able to purchase lumber from my father's neighbor for $1 per 2x4x8, so we bought all we could fit in our 4Runner.
After the kids and dog approved of the new lumber, I began constructing the walls loosely based on my concept drawing.  One thing I would change from the drawing was double-doors instead of a single large door, the trim boards (which are only for aesthetic purpose would only be installed at the end of the project, if we felt the need) and we also decided to scrap the planter box above the nesting boxes.
I originally planned on using 4X4s for the corner pieces but since I was able to get the 2X4s for so cheap, I just doubled them up (see side pieces above).  I used some 9' 2X4s for one side of the wall and 8' on the other to make the pitch of the roof.  Then I framed out my double doors and added some angled support braces on the legs, under the walls.  Next, a window!


I found a piece of glass in our shed from the previous owner that looks like it was part of a table at some point. Thick, tempered and somewhat beveled - perfect.  I used some pieces of 1X4 and molding I found laying around to build a basic frame around the glass.
Next, I framed the window into one of the wall sides I made (the one without the double-doors) making sure to leave a small gap around the window to allow room for it to swing open.

Simple!
Next, erect the walls (with help from pops!).  Since I already had the bottom half of the run built, I decided to attach the walls of the coop to the existing structure, especially since the 4X4s are anchored in concrete!  I found 4 concrete blocks, sunk them into the ground as foundation for the walls and made them as level as possible.
One wall up! and the first time we were able to get a really good idea of how this thing was going to look.
Once I attached the second wall to the existing structure I was able to build the back wall that is going to hold the nesting boxes.


On the next post I will show you how I built the nesting boxes off the back of the coop...

Better know a chicken

A few of the birds are starting to become easier to tell apart, so they are getting names!
Roll Call!!!


This big gal (who, I swear to Xenu, thought was going to turn out to be a rooster) stands out the most, with her alpha like mentality and flecks of white on her breast - I named Joan.  After one of my most favorite actresses; Joan Crawford.  (That chick didn't take no guff!)


The other Ameraucana (who, for what it's worth, lasted way longer then I had mentally predicted.  She was a little mangy and was definitely the runt of the group) is a little chatty.  She consistently vocalizes the most, and has a distinct bravado not unlike a vaudeville singer.  This little spitfire, I thought should be named Ethel.  Like Ethel Merman. 


Of the Barred Rocks, there is one that stands out.  She has more white then she does black and she is long and lean and the most skitterish of the four, hence the blurry pic.  Winny named her Chickafella.


One of the other barred rocks has a crooked crown, it kind of goes to one side then flips and goes to the other side.  We shall call her, Royal. (Crown Royal, get it?  See what we did there)


The other two Barred rocks are indistinguishable so for now they will remain nameless.  Unless we can find some way to tell them apart.  Maybe like a bell or something?  No, not a bell. Some string or an anklet maybe?

With a chick chick here, and a chick chick there...

Here a chick, there a chick, everywhere a .... well you get the point

Looking at the Ameraucanas in the sun, I noticed how the black feathers had a green iridescent quality.  They are absolutely beautiful.  Other colors flecked throughout, purple in some light, these birds are nice to look at.


The hen house has been getting some modifications!  We did a lot fine tuning once the girls got here.  It did not help that the overnight lows were just a hair above freezing! 

I felt bad not having a heat source, so I took some old terra cotta pots and put them in the oven.  I made a little area in the corner of the coop with some cinder blocks and put the hot pots on top of the blocks to add some warmth. When the pots cooled, it went back into the oven (I did this in the middle of the night, mind you!)  This little system was not going to work past one night, we needed a lamp.

We added more bedding, some garage door weather stripping, and went out and bought a heat lamp (with some chicken treats and scratch!)  Those poor little dears were piled on top of each other trying to keep warm!


Next Noah made a little outdoor table/roost out of a pallet and some scrap wood we had laying around.  The chickens absolutely love it.  They are always under it, scratching around for bugs, or hopping up on the flat top and flapping up to the roost.


Noah installed a solar panel on the roof.  He then installed the battery, charge controller, and switch right inside the door in the coop up high enough that the birds can not get to.  Then he made this light fixture to run off of the panel.  The system will be able to provide enough power to run the light, and with left over voltage so that when the heat of the summer is in full swing he can add a an in-ceiling fan to keep the girls nice and comfy.  My biggest concern is the heat, which will be here before we know it.  The summers here can be stifling.  Dry and hot.  However, that is a bridge that we will cross in a few months.  For now we will enjoy the cold weather while it lasts, us with our warm blankets and heaters, them with their  heat lamps.


We made use of the kids old play oven and put it in the run for the little chicks to enjoy.  They like to climb in and sit in the narrow space on the bottom shelf, or hop up on top and get a great view of the yard.

Every morning they cant wait until the door is open to get out into the run!

Refinished Rocking Chair

I have this awesome rocking chair that my grandparents gave me when I was pregnant with my first kid.  It had a light finish on it, but really needed to be stained and sealed.  It remained in that condition for years.  As we moved from place to place, it always came with us.  Patient and ready for it's new lease on life, there is sat... waiting.  :(

Now that we have moved to this nice open property, I have been motivated to get it protected!  I want to have my rocker out on the front porch, with out worry.  A trip to the hardware store, and I got all I needed!  I set to work right away, before the motivation waned.  I had sanded it bare a few years back, in fact when I was pregnant with my second child (and she is 5 now!) so really it should be easy! (haha)

I got the stain all done in one day, and was ready to start the first coat of vanish the next day.


After the first coat (letting it dry overnight) I did another light sand and the second coat.  There was rain in the forecast, so I was really rushing to get at least that second coat on before there was too much moisture in the air.  So I slapped that on and cleaned up my refinishing mess...for now!

I had used wood filler back when I sanded it down for the first time (5 years ago..oops!) and it didn't take the stain like I had hoped.  Oh well, I guess I shouldn't have waited so long, eh?

After the rains came and went, and a few more days on top of that (did I mention it was finals week?) I got the third coat of varnish down.  Doesn't it look great!?


Now I can rock on my front porch and wave to the neighbors as I watch them ride by on their horses and bikes. (And shake my fist at the ones in cars that fly down the road, slow down!  This is a neighborhood!)  The sounds of goats, and peacocks, and roosters fill the air; the sing song of the free range coming from our neighbors.  We have joined them, embedded ourselves in this.  Oh country living, how I love you.

We finally got the chickens!

So, now that the coop has been finished enough to actually house some fine feathered friends, we felt it was time to visit the chicken farm and ask some questions before we actually brought any hens home.  We saw some Barred Rocks and Easter eggers still in the brooder.

There has been unseasonably cold weather recently and it looks like it will be here for a good week or two (frost on my aloe!) so we are just going to have to wait to have to wait (darn the luck!) for the barred rocks that we wanted to be able to come out of the brooder.

Frost on everything!  I thought this was California?

We have not equipped the coop for any sort of heat source.  The chickens we want are about 2 1/2 months old.  So plans were made to come back in a few days and get those birds!

It took a bit longer then that.... did I mention that this is procrastination ranch?

Delays aside, we did it!  We decided on four Barred Rocks and two Ameraucanas.  They were all around the same age (hatched late Sept/early Oct) and were young enough that they would grow up around us.  The kids could hardly contain their excitement!

Getting use to their new home!
Come on out ladies, we're here!


We emptied the bags carefully into the coop and watched as the little gals ran around.  They took to the food and water right away, no problems!

I noticed that one of the Ameraucanas was the smallest of the group.  Other then that I could not tell them apart at all!

The four Barreds all looked the same to me, but I figured that their personalities would come about as we all spent more time together.

Out getting some sun :)

This was it, our first step towards our little homestead.  What we had talked about and planned for years was coming to fruition.  It is a nice sense of accomplishment, we put our minds to something and made it happen. 

Something that was surprising; the chickens were still cheeping!  The little noises I had been expecting to hear coming from the yard was not the bok bok cluck, but rather a tiny high pitched kind of squeak!  It was the. cutest. ever.